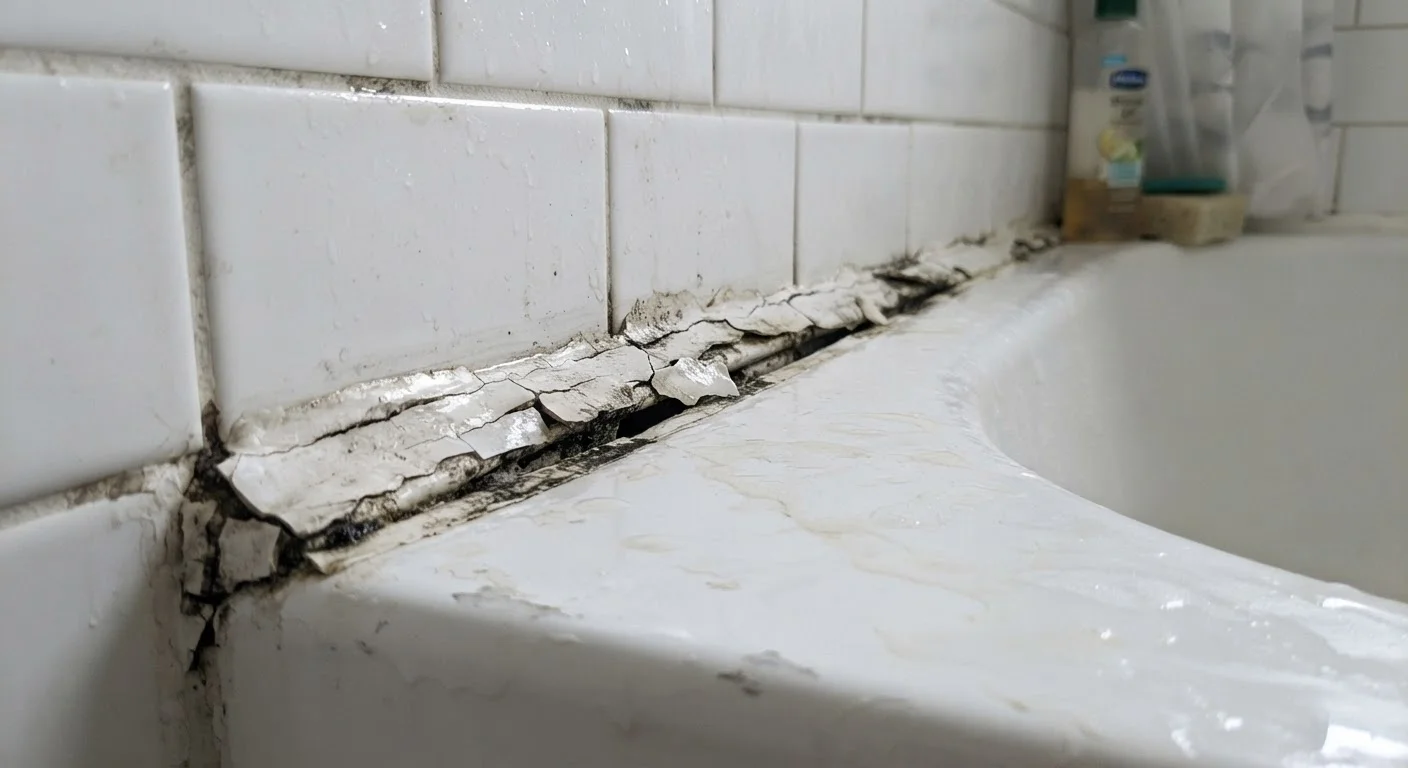
Why Caulk Keeps Letting You Down
A fresh bead of caulk should last five to ten years in a well-maintained bathroom or kitchen. In practice, many homeowners find themselves recaulking the same spots every season. The problem almost never comes down to the product itself - it comes down to what happened before the caulk gun came out.
Caulk is a flexible sealant, not a structural repair material. It works by bonding to two clean, stable surfaces and flexing as those surfaces expand, contract, or shift slightly. Break any part of that equation - contaminated surfaces, wrong product, movement before it cures - and the seal fails. Understanding why helps you fix it once, correctly, instead of over and over again. For a broader look at how ignoring small maintenance tasks compounds into bigger costs, see why small neglected tasks escalate.
The Most Common Caulking Mistakes
The mistakes below account for the vast majority of premature caulk failures. Each one is avoidable with the right preparation.
Caulking over existing caulk without removing the old layer first.
Why it happens: Removing old caulk is tedious, and a fresh layer on top looks clean initially - so many people skip the removal step entirely.
Applying caulk to a damp or recently cleaned surface.
Why it happens: It feels counterintuitive to wait - the surface looks clean right after scrubbing, so it seems ready.
Using an interior acrylic caulk in a wet shower or tub surround.
Why it happens: Acrylic caulk is cheaper and easier to tool than silicone, and many general-purpose tubes are marketed broadly without clear location guidance.
Caulking a joint that is still moving or not structurally stable.
Why it happens: A loose tile or a settling threshold looks like a caulk problem on the surface, so caulk seems like the fix.
Applying too thick a bead and not tooling it properly.
Why it happens: More caulk seems like it would seal better, and skipping the smoothing step saves a few minutes.
Prep Steps That Actually Make a Difference
Good caulk prep follows a consistent sequence regardless of location. First, remove all old caulk using a plastic scraper or caulk-removal tool. Avoid metal blades on tubs and fiberglass - they scratch. Once the old material is out, clean the joint with isopropyl alcohol or a dedicated surface cleaner and let it dry completely. In humid bathrooms, that may mean running a fan or waiting overnight.
Check the joint for any mold growing beneath the surface. Superficial mold can be treated with a diluted bleach solution, but if mold penetrates the grout or substrate, address that underlying moisture problem first - recaulking over active mold just delays the damage. Painting over mold is a common myth that applies equally to caulking over it.
Finally, confirm you're using the right product for the location. Silicone holds up in fully wet areas like shower pans; latex or acrylic suits painted trim and baseboards where paintability matters. If you're unsure, compare silicone and acrylic caulk formulas before you buy.
Don't Caulk Over Mold or Active Moisture
If you can see mold growing in or around the old caulk joint, sealing over it will not solve the problem - it will trap moisture and allow mold to continue spreading underneath. Identify and address the source of excess moisture (poor ventilation, a slow leak, improper grading) before resealing. When in doubt, have a professional assess the extent of any moisture intrusion before proceeding.
After applying a fresh bead, smooth it with a dampened finger or caulk tool and resist the urge to run the shower or turn on the faucet. Most caulks need 24 hours to skin over and up to 72 hours for a full waterproof cure. Check the product label - cure times vary significantly by formula and humidity level.